
As an Amazon Associate I earn from qualifying purchases.
How to Clean Backup Camera Lens.To clean your backup camera lens, start by gently wiping it with a microfiber cloth. If the lens is particularly dirty, you can use a cotton swab dipped in rubbing alcohol to remove any stubborn dirt or debris. Once the lens is clean, dry it off with a soft, lint-free cloth before using your camera again.
- Unscrew the backup camera lens from the camera body
- Use a soft, dry cloth to gently wipe away any dirt or debris from the lens surface
- If the lens is very dirty, dampen the cloth with water and lightly wipe the surface again
- Be sure to dry the lens completely before screwing it back onto the camera body
Contents
HOW TO CLEAN BACKUP CAMERA LENS
How Do You Clean a Blurry Backup Camera?
If your backup camera is blurry, there are a few things you can do to clean it. First, check the lens for any dirt, smudges, or debris. If there is anything on the lens, use a soft cloth to gently wipe it away.
Be careful not to scratch the lens. Next, take a look at the camera itself. If it is mounted in a way that allows access to the back of the camera, you can try cleaning the sensor with compressed air or a cotton swab.
If you cannot reach the sensor, you may need to remove the camera from its mount and clean it manually. Finally, if your backup camera is still blurry after taking these steps, it may be time to replace it.

Why is My Backup Camera Cloudy?
If your backup camera is cloudy, it’s likely due to condensation. When warm air hits the cold lens of the camera, it can cause water droplets to form. This is especially common in humid climates or after a car wash.
To fix a cloudy backup camera, start by wiping down the lens with a soft cloth. If that doesn’t work, you can try using a hairdryer on low heat to gently remove the moisture. You can also try leaving the camera turned on for a few minutes to allow the heat from the electronics to evaporate any moisture on the lens.
If your camera is still foggy, you may need to take it to a professional for servicing.
What Chemical Can Be Used to Clean Up Back Up Camera Lens?
A back up camera is a handy tool that helps drivers see behind them when backing up. Over time, the lens on the camera can become dirty, making it difficult to see clearly. There are a few different ways to clean a backup camera lens, but the easiest and most effective way is to use a chemical cleaner specifically designed for this purpose.
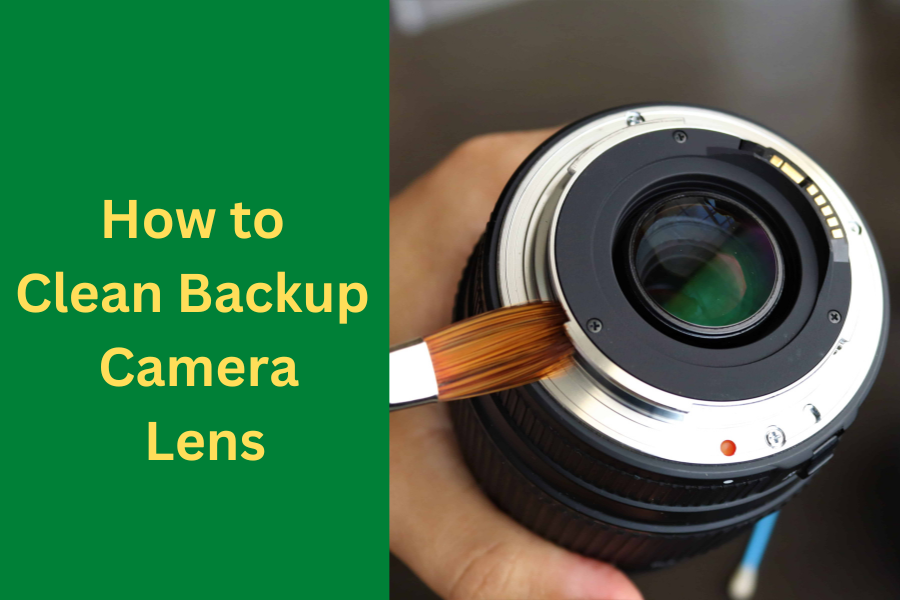
There are several different brands of backup camera lens cleaners available on the market, but they all generally work in the same way. The cleaner will come with a small brush or pad attached to the end of a long rod. This allows you to reach the lens without having to remove it from the vehicle.
Simply apply the cleaner to the lens and scrub gently with the brush until all of the dirt and grime is removed. Most backup camera lens cleaners also contain an anti-fogging agent that will help keep your lenses clear and free of condensation. This is especially important if you live in an area with high humidity levels.
After cleaning your lenses, be sure to wipe them down with a dry cloth before using your camera again.
Can You Use Rubbing Alcohol to Clean Camera Lens?
Yes, you can use rubbing alcohol to clean your camera lens. However, it’s important to be careful when using rubbing alcohol on any surface, as it can potentially damage the surface if used excessively or incorrectly. When cleaning your camera lens with rubbing alcohol, be sure to use a soft, lint-free cloth and only apply the alcohol to the cloth, not directly to the lens.
Gently wipe the lens in a circular motion until it is clean. Once you’re finished cleaning with rubbing alcohol, rinse the lens with fresh water and dry it off with a microfiber cloth before using it again.
How to Clean Foggy Camera Lens
If your camera lens has become foggy, there are a few things you can do to clean it. First, try using a soft, dry cloth to wipe the lens. If that doesn’t work, you can use a lens cleaning solution and a microfiber cloth.
Be sure to follow the instructions on the cleaning solution carefully. You may also need to use a blower brush to remove any stubborn debris. If your camera lens is still foggy after trying these methods, you may need to take it in for professional cleaning.
How to Clean Foggy Backup Camera Lens
If your backup camera is foggy, it can be a real pain. You may not be able to see clearly when you’re backing up, making it more difficult to avoid obstacles. Fortunately, there are a few things you can do to clean your backup camera lens and improve its clarity.
One simple way to clean your backup camera lens is to use a soft cloth dampened with water. Gently wipe the lens in a circular motion until it’s free of dirt and debris. If the lens is especially dirty, you may need to use a mild soap solution instead of water.
Be sure to rinse the lens well afterwards so that no soap residue is left behind. Another option for cleaning your backup camera lens is using a cotton swab dipped in rubbing alcohol. Rub the cotton swab around the perimeter of the lens until it’s clean.
This method is especially effective at removing fingerprints and other smudges from the lens surface. If your backup camera lens is still foggy after trying these cleaning methods, there may be something else going on such as condensation inside the housing or an issue with the wiring. In this case, it’s best to consult with a professional who can diagnose and fix the problem for you.
How to Remove Backup Camera Lens
If your backup camera is dirty or obstructed, you may need to clean or replace the lens. Here’s how to remove the backup camera lens:
- Disconnect the power supply to the backup camera.
- Remove the screws that hold the camera housing in place.
- Carefully remove the housing and set it aside.
- unscrew The retaining ring that holds the lens in place.
- gently pull The lens out of the housing.
- Clean The lens with a soft, dry cloth.
Backup Camera Lens Replacement
Backup cameras are a vital safety feature for any vehicle. If your backup camera is not working properly, it could put you and others at risk. Replacing the lens on your backup camera is a relatively easy process that can be completed in a few minutes.
Before beginning, make sure that you have the proper tools and replacement lens. You will need a Phillips head screwdriver and a small flat head screwdriver. The replacement lens should fit snugly into the housing on the back of your car.
To begin, remove the two screws from the back of the housing with your Phillips head screwdriver. Be careful not to lose these screws as they are important for reassembling your camera later. Next, use your small flat head screwdriver to pry open the housing.
Gently pull out the old lens and discard it. Take your new replacement lens and insert it into the housing, being careful not to damage it. Finally, replace the two screws on the back of the housing and tighten them securely.
Your backup camera is now ready to use!

Polish Backup Camera Lens
If you have a backup camera in your car, you know how useful it can be. But over time, the lens on the camera can become cloudy or scratched, making it difficult to see. That’s why it’s important to clean and polish your backup camera lens regularly.
To clean your backup camera lens, start by using a soft, dry cloth to remove any dust or dirt. If there are any stubborn spots, you can try using a mild glass cleaner. Be sure to avoid cleaners that contain ammonia, as this can damage the lens coating.
Once you’ve removed all of the dirt and grime, use a microfiber cloth to buff the lens until it’s shining. If your backup camera lens is looking dull or scratched, you may need to polish it. You can buy special polishing kits that come with everything you need, or you can simply use a soft cloth and some toothpaste.
Apply a small amount of toothpaste to the cloth and rub it into the scratches in a circular motion. Rinse away the toothpaste and dry the lens with a microfiber cloth. With just a little bit of care, you can keep your backup camera lens clean and clear for years to come!
Where is the Backup Camera Located
One of the most important safety features in many newer vehicles is the backup camera. This feature allows drivers to see what is behind them when they are backing up, and can help to avoid accidents. The backup camera is usually located in the center of the rear of the vehicle, just above the license plate.
In some cases, it may be integrated into the rear view mirror. If you’re not sure where your backup camera is located, consult your vehicle’s owner’s manual.
Disassemble Backup Camera
Assuming you would like a blog post discussing how to disassemble a backup camera: Most backup cameras will be mounted on the rear of your vehicle, either above or below the license plate. If your camera is mounted below the license plate, there may be a plastic or metal bracket holding it in place.
In this case, remove any screws or bolts attaching the bracket to your car (these will likely be located near the top corners of the bracket). Once the bracket is removed, gently pull the camera away from the mounting surface. If your camera is mounted above the license plate, it will likely be held in place by two small screws.
Use a Phillips head screwdriver to remove these screws and then carefully pull the camera away from the mounting surface. Now that you have access to the back of the camera, you should see a small circuit board with a cable running into it. This cable connects the camera to your car’s display screen.
Carefully disconnect this cable by gently pulling it out of its socket on the circuit board. Once disconnected, you can now remove the entire circuit board from inside the camera housing. With Circuit Board Removed: You should now have access to all ofthe individual components that make up your backup camera.
These includes items such as: -The Image Sensor (this is what captures pictures) -The Lens (this focuses light onto image sensor)
-Infrared LEDS (these emit invisible light used for night vision) -Status Indicator LED (this lights up when power is connected) Mostof these items are delicate and can easily be damaged, so handle with care!
Car Reverse Camera Foggy
Reverse cameras are a great addition to any car. They help you see what’s behind you when backing up, and can even be used to monitor blind spots. But like any other piece of technology, they can occasionally experience problems.
One common issue is foggy lenses. Foggy lenses on a reverse camera can be caused by a few different things. First, if your car is parked in an area that gets a lot of direct sunlight, the heat can cause the moisture inside the camera to condense and fog up the lens.
This is particularly common in humid climates. Second, if you live in an area with high temperatures and humidity, such as near the ocean, salt water can corrode the camera housing and cause fogging. Finally, if your car wash uses harsh chemicals or high pressure hoses, this can also damage the camera housing and lead to fogging.
If your reverse camera has started to fog up, there are a few things you can do to clean it. First, use a soft cloth or cotton swab dipped in distilled water or eyeglass cleaner to gently wipe away any condensation on the lens. Be careful not to scratch the surface!
If this doesn’t work, you may need to remove the camera from its housing and clean it with compressed air or a vacuum cleaner attachment designed for cleaning electronics. Again, take care not to damage the lens while doing this.
Conclusion
If your backup camera is dirty, it can impact the quality of the image. Here are a few tips on how to clean the lens of your backup camera: -Use a soft, dry cloth to wipe away any dust or debris.
-If there are stubborn stains, you can use a mild soap and water solution. Be sure to rinse the lens thoroughly afterwards. -Avoid using harsh chemicals or abrasive materials, as this could damage the lens.
As an Amazon Associate I earn from qualifying purchases.