
As an Amazon Associate I earn from qualifying purchases.
A camera lens is typically attached to a camera body by screwing it into the camera’s lens mount. Most modern cameras have autofocus, which means that the lens has a motor in it that will focus the lens for you. There are also manual focus lenses available, which require you to turn a ring on the lens to focus it yourself.
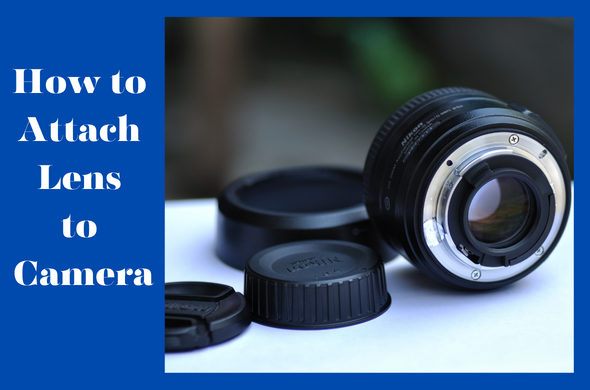
- Unscrew the lens cap from the front of the lens
- Align the red dot on the camera body with the red dot on the lens
- Insert the lens into the camera body and twist it clockwise until it clicks into place
- Screw the lens cap back onto the front of the lens
Contents
how to attach or remove a Lens from a Canon DSLR
How Do We Attach a Lens into Your Camera?
In order to attach a lens into your camera, you need to first identify the mount type of your camera. The four most common mounts are Canon EF, Nikon F, Sony A, and Pentax K. Once you know the mount type, you can purchase a compatible lens. To physically attach the lens to the camera, start by aligning the red dots on the lens and camera body.
Then twist the lens clockwise until it clicks into place. Some lenses have a switch that needs to be in the “unlocked” position before attaching. If your camera has an auto bayonet release lever, make sure it is pushed down before inserting the lens.
How Do You Attach a Canon Lens to a Camera?
Canon DSLR cameras use an EF lens mount, which stands for “electro focus”. The EF mount was introduced in 1987 along with the Canon EOS line of cameras. All Canon DSLRs released since have used the EF mount.
To attach a Canon lens to a camera, first make sure that the camera is off. Next, align the red dot on the lens with the red dot on the camera body. Then, gently twist the lens clockwise until it clicks into place.
Can I Keep My Lens Attached to My Camera?
It’s generally safe to keep your lens attached to your camera, but there are a few things you should keep in mind. First, be aware of the possibility of static electricity damaging your camera’s sensor. If you’re going to be shooting in dry conditions, it’s a good idea to put a piece of tape over the sensor before attaching the lens.
Second, make sure that the mount on the camera and the lens are clean and free of debris. A dirty mount can cause scratches on the sensor or even damage the circuitry. Finally, be careful not to bump or drop your camera with the lens attached; this could easily break either the lens or the camera body.
Why Won’T My Lens Attach to My Camera?
If you’re having trouble attaching your lens to your camera, there are a few things you can check. First, make sure that the lens is compatible with your camera model. Second, check that the mount on the lens is clean and free of debris.
Third, align the red dot on the lens with the red dot on the camera body. Finally, twist the lens until it clicks into place. If none of these solutions work, you may need to take your camera to a professional for service.
How to Attach Lens to Camera Nikon
If you’re a Nikon user, chances are you’ve wondered how to attach lens to camera. It’s actually quite simple, and once you know how, it’ll be a breeze! Here’s a quick guide on how to do it:
- Start by removing the rear cap from your lens. This is usually done by unscrewing it counter-clockwise.
- Next, take off the front cap of your camera body.
- You should see the bayonet mount now exposed. 3. Align the red dots on your lens with the red dot on your camera body. Once they’re lined up, gently insert the lens into the mount until you hear a click indicating that it’s locked in place.
- Finally, screw on the front cap of your lens clockwise until it’s snug. And that’s it! You’re now ready to start using your attached lens.
How to Put a Lens on a Canon Camera
If you’ve never put a lens on a Canon camera before, don’t worry – it’s easy! Just follow these simple steps and you’ll be up and running in no time.
1. Start by removing the cap from the front of your camera. You should see the bayonet mount now exposed.
2. Align the red dots on your lens with the red dot on your camera body. Once they’re lined up, gently insert the lens into the mount until you hear a click indicating that it’s locked in place.
3. Gently push the lens into place until you hear a click, indicating that it’s locked in place. 4. That’s it! You’re now ready to start taking pictures with your new Canon camera and lens combo!
How to Take a Lens off a Canon Camera
Assuming you want a blog post about taking the lens off a Canon camera: “How to Take a Lens off a Canon Camera” Most people don’t know how easy it is to take the lens off a Canon camera.
It’s actually a pretty simple process that anyone can do. Here’s a step-by-step guide on how to take the lens off your Canon camera:
- Start by powering off your camera.This is an important step because you don’t want to accidentally damage your camera while taking the lens off.
2. Once your camera is powered off, locate the lens release button on the side of the camera body. The location of this button may vary depending on what model of Canon camera you have, but it should be fairly easy to find.
- Press and hold down the lens release button while simultaneously twisting the lens counter-clockwise until it comes loose from the mount. Be careful not to force it – if it’s stuck, make sure you’re holding down the right button before gently trying again.
- And that’s it!
How to Take off Camera Lens Nikon
Whether you’re a professional photographer or amateur, knowing how to take off your camera lens is an important skill. Here’s a step-by-step guide on how to do it:
- Make sure your camera is turned off. If it’s not, turn it off now.
2. Remove the lens cap from the front of the lens.
3. Take a look at the mount on the back of the lens. You should see two plastic tabs on opposite sides of the mount.
4. Grip the lens with one hand and push down on one of the tabs with your thumb while pulling the lens away from the camera body with your other hand. The lens should come right off.
If it doesn’t, try pushing down on both tabs at once while pulling the lens away from the camera body.
How to Open Camera Lens for Cleaning
If you’re like most people, your camera is one of your most prized possessions. So when it starts acting up, it can be really frustrating. One common issue that can occur is dirt or fingerprints on the lens, which can interfere with picture quality.
Luckily, it’s relatively easy to clean your camera lens – you just need to know how! Here are some simple steps for cleaning your camera lens:
- Start by removing the lens cap and blowing any dust off of the lens surface with compressed air. You can also use a soft brush to gently remove any debris.
2. If there are still smudges on the lens, dampen a soft cloth with water and lightly wipe the surface until they’re gone. Be sure not to use too much water, as this could damage the lens coating.
- For stubborn fingerprints or grime, you may need to use a mild cleaner such as rubbing alcohol or eyeglass cleaner. Apply a small amount of cleaner to a cotton swab and carefully wipe away the residue. Again, be careful not to saturate the cloth or swab – too much cleaner could damage the lens coating.
4. Once you’ve done that, simply twist the lens until it clicks into place. Now your camera is ready to zoom in and capture those far away shots!
Also you may read: how to clean backup camera lens
How to Remove Lens from Camera
Assuming you want to know how to remove the lens from most DSLR cameras:
1. Start by holding the camera body in your left hand. In your right hand, hold the lens at the base where it meets the camera.
2. Next, press and hold the tiny button on the left side of the camera (as you’re looking at it) while turning the lens counter-clockwise until it comes loose.
3. The lens should now be free from the camera body!
How to Attach Telephoto Lens to Canon
If you’re a Canon user looking to attach a telephoto lens, there are a few things you need to know. First, make sure your camera is compatible with the lens- some older models aren’t. Second, it’s important to align the red dot on the lens with the red dot on the camera mount.
Once you’ve done that, simply twist the lens until it clicks into place. Now your camera is ready to zoom in and capture those far away shots!
How to Take Camera Lens off iphone
It’s pretty easy to take the camera lens off your iPhone. All you need is a small screwdriver and about a minute of time. First, locate the two screws on the outside of the lens.
They’re usually silver and located near the top and bottom of the lens. Next, use your screwdriver to remove those screws. Once they’re out, gently pry the lens off of your phone.
Be careful not to damage any of the surrounding components. If everything looks good, you can now put your new camera lens on!
Conclusion
It’s easy to attach a lens to your camera – simply follow these steps:
1. First, remove the cap from the lens. If there is no cap, skip to step.
2. Next, locate the mount on the camera body. This is usually on the front of the camera, near where the lens would sit.
3. Align the mount on the lens with the mount on the camera body, and then gently twist clockwise until it clicks into place.
You’ll know it’s properly attached when you hear a “click” sound or feel a slight resistance when turning. If there is no click or resistance, try twisting counterclockwise until you feel it click into place.
4. That’s it!
You’re now ready to take photos with your newly attached lens!
As an Amazon Associate I earn from qualifying purchases.